Make Your Own Paper Bag Book
This post may contain affiliate links.
Paper Bag Books

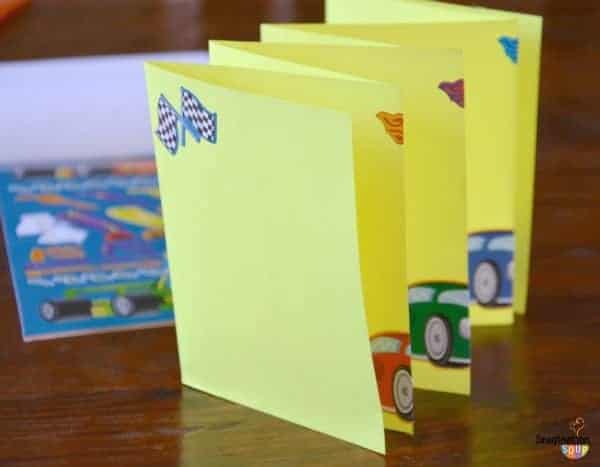
DIY Paper Bag Book

1. Stack two paper bags, one on top of the other – each facing different directions.

2. Fold the two bags in half.

3. Staple in the middle fold. To get the stapler to reach, you’ll have to fold under some of the page.

4. Paint all the papes. We used tempora paints.
The next steps are totally up to you. Use your imagination to continue.
Here’s what we did for our books.

5. We used the Usborne book, How to Draw Fairies and Mermaids to make our books about fairies. We went to Google images and found flowers. Then, we printed, cut, and pasted the flowers in our book.
6. JJ and I drew fairies in and around the flowers.

7. We described what the fairies were doing. I wrote on separate paper and pasted it on the pages since the paint was tricky to write on. JJ wrote directly on the flowers in some pages.

8. Let the bottom of the bags become lift-the-flaps. See this flap? Closed above. Open below.

Participating Bloggers:
Paint Cut Paste, Imagination Soup, Hands On: As We Grow, Child Central Station, Putti Prapancha, Irresistible Ideas for Play-Based Learning, Teach Preschool, The Chocolate Muffin Tree, Nurture Store, Small Types,Make Do & Friend, The Imagination Tree, Toddler Approved, Red Ted Art, Kids in the Studio, Rainy Day Mum, Glittering Muffins, Sense of Wonder, Mom To 2 Posh Lil Divas, Come Together Kids, My Creative Family, Kitchen Counter Chronicles, A Mom With A Lesson Plan, Angelique Felix, The Golden Gleam, Clarion Wren, Living at the Whitehead’s Zoo, Let Kids Create, De tout et de rien, PlayDrMom, Creativity My Passion, Kiwi Crate, Tinkerlab
There’s still time to join the challenge. Visit TinkerLab or the Kiwi Crate Blog where they can add a photo or link in the comment section. One entry per person, please.


I thought the paper bag book was a neat idea. Then, I saw all the links. Lots to explore today. Thanks.